Mastering the Reverse Smokey Eye: Modern Eyeshadow Techniques
In a sea of beauty trends, the reverse smokey eye stands out as a bold and innovative approach to eyeshadow application. Gone are the days of sticking to conventional methods – it’s time to embrace the unexpected and unleash your inner artist. Join us as we explore the nuances of this captivating technique, empowering you to elevate your makeup looks to stunning new heights.
Understanding the Reverse Smokey Eye: Breaking Down the Basics
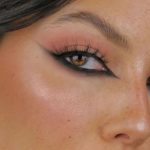
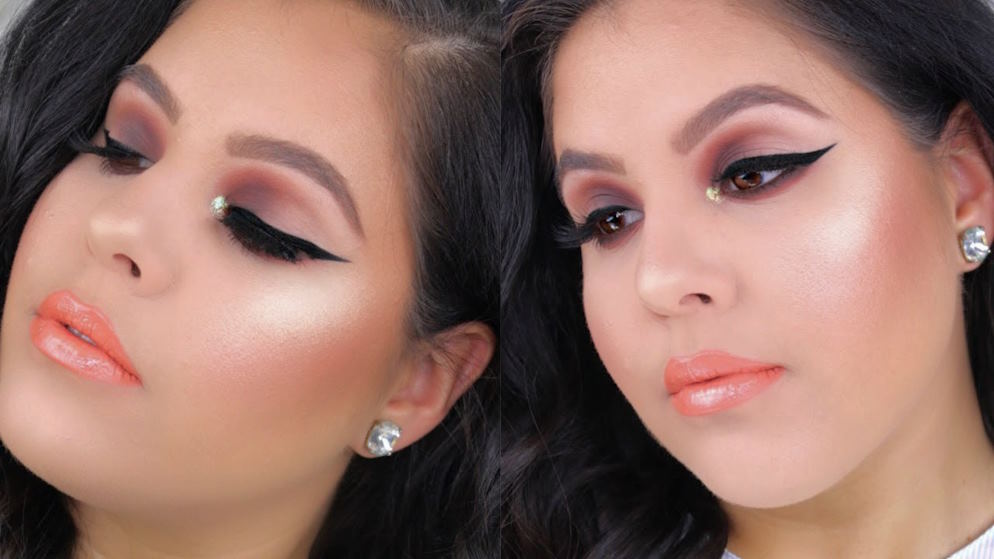
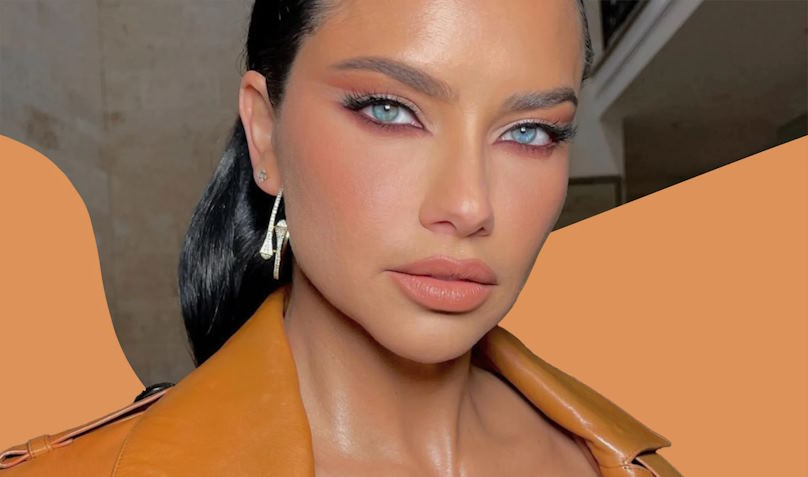
Before diving into the step-by-step process, let’s understand what sets the reverse smokey eye apart from its traditional counterpart. Unlike the classic smokey eye, where dark eyeshadow is applied to the outer corners and crease of the eye, the reverse smokey eye reverses this technique, placing the darker shades on the inner corners and blending outwards. This creates a unique and captivating effect that draws attention to the eyes.
Choosing the Right Shades: Playing with Color and Contrast
One of the keys to mastering the reverse smokey eye is selecting the perfect eyeshadow shades. Opt for a combination of light, medium, and dark hues to create depth and dimension. Experiment with contrasting colors to make your eyes pop, or stick to neutral tones for a more subtle look. Remember to choose eyeshadows with good pigmentation and blendability for seamless application.
Prepping the Canvas: Essential Tips for Flawless Application
Before diving into the eyeshadow application process, it’s essential to prep your eyelids properly. Start by applying a primer to create a smooth base and prolong the wear of your eyeshadow. Set the primer with a translucent powder to prevent creasing and ensure long-lasting color payoff. This step is crucial for achieving a professional-looking finish.
Mastering the Technique: Step-by-Step Guide to Creating the Reverse Smokey Eye
Now that you’ve prepped your lids let’s dive into the step-by-step process of creating the reverse smokey eye:
- Prime and Set: Start by applying an eyeshadow primer to your lids and setting it with a translucent powder to create a smooth base.
- Apply Transition Shade: Using a fluffy blending brush, apply a transition shade slightly above your crease to create a seamless transition between colors.
- Darken the Inner Corners: Using a smaller brush, apply a dark eyeshadow to the inner corners of your eyes, gradually building up the intensity.
- Blend Outwards: Using windshield wiper motions, blend the dark eyeshadow outwards towards the outer corners of your eyes, focusing on creating a gradient effect.
- Highlight the Brow Bone: Finish off the look by applying a shimmery eyeshadow to the brow bone to highlight and lift the eyes.
Finishing Touches: Perfecting Your Reverse Smokey Eye Look
Finish off with a few coats of mascara to volumize and lengthen your lashes. Remember to clean up any fallout or smudges with a makeup wipe for a polished finish.